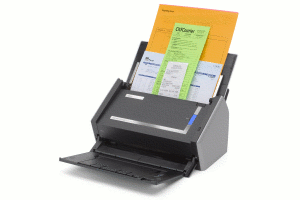
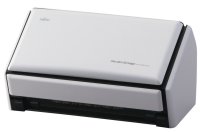
A few days ago I took delivery of a used Fujitsu ScanSnap S1500 (currently about 400€ new, I got mine for 235€ on eBay), and started on the long job of making my home office paperless.
xsane
The best news: it works out of the box with Linux (Ubuntu 11.10). Just install xsane as scanning software and you’re running. xsane is great for custom scanning (where you want some colour, some higher resolution (the scanner does up to 600dpi), lineart, duplex …).
scanbuttond
…but for your run-of-the-mill office scanning, you probably just want grey at 150dpi with fairly high compression (comes out at ~150kb per pdf page), and the ability to whack in stacks of paper and just keep on hitting the “Go” button. For this I installed scanbuttond and sane-utils on my home server (a little box under my table) and put together a little buttonpressed.sh script so every time the button is pressed, it creates a pdf in a network shared folder (which has the advantage that I can access my scanned documents from any computer in the house, and even scan without turning my desktop on!)
#!/bin/bash
OUT_DIR=/mnt/raid/scan
TMP_DIR=`mktemp -d`
cd $TMP_DIR
echo "################## Scanning ###################"
scanimage \
 --resolution 150 \
 --batch=scan_%03d.tif --format=tiff \
 --mode Gray \
 --device-name "fujitsu:ScanSnap S1500:7739" \
 -y 297 -x 210 \
 --page-width 210 --page-height 297 \
 --sleeptimer 1
echo "############## Converting to PDF ##############"
#Use tiffcp to combine output tiffs to a single mult-page tiff
#tiffcp -c lzw scan_*.tif output.tif
tiffcp scan_*.tif output.tif
#Convert the tiff to PDF
tiff2pdf output.tif -j -q 60 -p A4 > $OUT_DIR/scan_`date +%Y%m%d-%H%M%S`.pdf
cd ..
echo "################ Cleaning Up ################"
rm -rf $TMP_DIR
I took much of the inspiration for the script from this article, which also uses tesseract for OCR, but that just makes a separate text file with the recognised text… I don’t like that, so I’m still looking for a way to embed the detected text into the pdf…
As you can see I had to hard code the scanner name because scanbuttond (last updated in 2006…) passes the device address, but the current version of scanimage needs the device name as given by scanimage -L , so they’re not really compatible with each other any more… :-/
I’ve also set it such that all pdfs will be A4, and like I said earlier, only 150dpi, and pretty lossy jpeg compression – that’s my default preference, YMMV.
The S1500 in detail
Now a little about the scanner itself. It’s about the size and weight of a compact inkjet printer (or a cat).


The fold-in/out mechanism is pretty easy, so I think even though I’m ultimately lazy, I might even flip that shut when I’m done to dust protect it. Other than that there’s not much to say… it has one button: bright blue… I know some people may have a fit at that…). It comes with a 240VAC to 24VDC adapter, and a usb cable. The paper feed opens with a little button on the right, and the insides are readily understandable and cleanable. Did I mention it has two scanning heads, so it does duplex? 🙂
De-papering my office
My first task with the scanner was to scan in my business receipts from last year – that’s about 300 items, but many of the smaller receipts (bus tickets etc.) are pasted onto A4 sheets (many to a sheet). It took me about 30 minutes to scan the lot, including the time to remove any staples or clips (a must!), and a few paper jams. I have no idea how long that would have taken with my old flatbed…
The s1500 isn’t resistant against paper jams, but I was surprised to see it handled all the worst sheets (lots of different receipts pasted to one sheet) easily, and only had difficulty with the recycled paper we use where the individual sheets stick a bit more to one another because of the rougher surface. With a bit of practice fanning the sheets, this isn’t much of an issue either, but you do have to keep an eye on it as it’s scanning to be sure it got each individual sheet…
All in all, I’m very happy with the decision, and am looking forward to shredding and archiving lots of paper out of my office!


